

搜索到
109
篇与
net
的结果
-
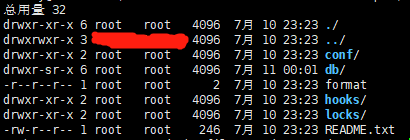
 docker运行svn 一、安装命令docker run -d \ --restart=unless-stopped \ --name svn \ -v /home/path:/var/opt/svn \ -p 3690:3690 \ garethflowers/svn-server二、开放端口查看端口是否开启firewall-cmd --list-all开启端口firewall-cmd --add-port=3690/tcp --permanent重启防火墙firewall-cmd --reload三、初始化仓库docker exec -it svn /bin/shcd /var/opt/svn && svnadmin create repos && cd repos打开 conf 配置文件资源仓库配置,修改 svnserve.confanon-access = none # 匿名用户不可读写,也可设置为只读 read auth-access = write # 授权用户可写 password-db = passwd # 密码文件路径,相对于当前目录 authz-db = authz # 访问控制文件 realm = /var/opt/svn/repos # 认证命名空间,会在认证提示界面显示,并作为凭证缓存的关键字,可以写仓库名称比如svn### users have read-only access to the repository, while authenticated ### users have read and write access to the repository. # anon-access = read # auth-access = write anon-access = none auth-access = write ### The password-db option controls the location of the password ### database file. Unless you specify a path starting with a /, ### the file's location is relative to the directory containing ### this configuration file. ### If SASL is enabled (see below), this file will NOT be used. ### Uncomment the line below to use the default password file. password-db = passwd ### The authz-db option controls the location of the authorization ### rules for path-based access control. Unless you specify a path ### starting with a /, the file's location is relative to the ### directory containing this file. The specified path may be a ### repository relative URL (^/) or an absolute file:// URL to a text ### file in a Subversion repository. If you don't specify an authz-db, ### no path-based access control is done. ### Uncomment the line below to use the default authorization file. authz-db = authz ### The groups-db option controls the location of the file with the ### group definitions and allows maintaining groups separately from the ### authorization rules. The groups-db file is of the same format as the ### authz-db file and should contain a single [groups] section with the ### group definitions. If the option is enabled, the authz-db file cannot ### contain a [groups] section. Unless you specify a path starting with ### a /, the file's location is relative to the directory containing this ### file. The specified path may be a repository relative URL (^/) or an ### absolute file:// URL to a text file in a Subversion repository. ### This option is not being used by default. # groups-db = groups ### This option specifies the authentication realm of the repository. ### If two repositories have the same authentication realm, they should ### have the same password database, and vice versa. The default realm ### is repository's uuid. # realm = My First Repository realm = /var/opt/svn/repos ### The force-username-case option causes svnserve to case-normalize ### usernames before comparing them against the authorization rules in the ### authz-db file configured above. Valid values are "upper" (to upper- ### case the usernames), "lower" (to lowercase the usernames), and ### "none" (to compare usernames as-is without case conversion, which ### is the default behavior). # force-username-case = none ### The hooks-env options specifies a path to the hook script environment ### configuration file. This option overrides the per-repository default ### and can be used to configure the hook script environment for multiple ### repositories in a single file, if an absolute path is specified. ### Unless you specify an absolute path, the file's location is relative ### to the directory containing this file. # hooks-env = hooks-env [sasl] ### This option specifies whether you want to use the Cyrus SASL ### library for authentication. Default is false. ### Enabling this option requires svnserve to have been built with Cyrus ### SASL support; to check, run 'svnserve --version' and look for a line ### reading 'Cyrus SASL authentication is available.' # use-sasl = true ### These options specify the desired strength of the security layer ### that you want SASL to provide. 0 means no encryption, 1 means ### integrity-checking only, values larger than 1 are correlated ### to the effective key length for encryption (e.g. 128 means 128-bit ### encryption). The values below are the defaults. # min-encryption = 0 # max-encryption = 256四、创建用户修改 passwd 文件,创建用户### This file is an example password file for svnserve. ### Its format is similar to that of svnserve.conf. As shown in the ### example below it contains one section labelled [users]. ### The name and password for each user follow, one account per line. [users] # harry = harryssecret # sally = sallyssecret admin = 123456 zhangsan = 123456 lisi = 123456五、分配权限修改 authz 文件,创建用户### This file is an example authorization file for svnserve. ### Its format is identical to that of mod_authz_svn authorization ### files. ### As shown below each section defines authorizations for the path and ### (optional) repository specified by the section name. ### The authorizations follow. An authorization line can refer to: ### - a single user, ### - a group of users defined in a special [groups] section, ### - an alias defined in a special [aliases] section, ### - all authenticated users, using the '$authenticated' token, ### - only anonymous users, using the '$anonymous' token, ### - anyone, using the '*' wildcard. ### ### A match can be inverted by prefixing the rule with '~'. Rules can ### grant read ('r') access, read-write ('rw') access, or no access ### (''). [aliases] # joe = /C=XZ/ST=Dessert/L=Snake City/O=Snake Oil, Ltd./OU=Research Institute/CN=Joe Average [groups] # harry_and_sally = harry,sally # harry_sally_and_joe = harry,sally,&joe administrator = admin test = zhangsan dev = lisi # [/foo/bar] # harry = rw # &joe = r # * = # [repository:/baz/fuz] # @harry_and_sally = rw # * = r [/] @administrator = rw @test = r @dev = rw 六、导出和导入全部数据svnadmin dump /var/opt/svn/repos/ > /var/opt/svn/backup/fullsvn.baksvnadmin load /var/opt/svn/repos/ < /var/opt/svn/backup/fullsvn.bak
 -
docker运行官方镜像embyserver docker run -d \ --name embyserver \ -v /path/to/programdata:/config \ # Configuration directory -v /path/to/share1:/mnt/share1 \ # Media directory -v /path/to/share2:/mnt/share2 \ # Media directory --net=host \ # Enable DLNA and Wake-on-Lan --device /dev/dri:/dev/dri \ # VAAPI/NVDEC/NVENC render nodes --device /dev/vchiq:/dev/vchiq \ # MMAL/OMX on Raspberry Pi --runtime=nvidia \ # Expose NVIDIA GPUs -p 8096:8096 \ # HTTP port -p 8920:8920 \ # HTTPS port -e UID=1000 \ # The UID to run emby as (default: 2) -e GID=100 \ # The GID to run emby as (default 2) -e GIDLIST=100 \ # A comma-separated list of additional GIDs to run emby as (default: 2) emby/embyserver:latest
-
-
-
小米路由MINI(R1C)刷 OpenWrt 本文包括三个部分:连接路由器 Shell下载和写入 OpenWrt 升级包配置 OpenWrt一、连接路由器 Shell现在小米已禁止刷官方ssh开启工具: https: //d.miwifi.com/rom/ssh 这里使用 openwrt 提供的方法:https://openwrt.org/toh/xiaomi/mini一、路由器固件降级下载官方旧版本固件(新版固件可能没法用以下方法):http://bigota.miwifi.com/xiaoqiang/rom/r1cm/miwifi_r1cm_firmware_b9d56_2.7.11.bin打开浏览器进入192.168.31.1路由管理界面选择【常用设置】-> 【系统状态】 -> 【升级】,选择刚才下载的文件确定。此时会提示系统降级最好删除配置文件,勾选并继续。等执行完,路由器会重启,并闪烁黄灯。一直等到蓝灯常亮,表示降级完毕。二、开启 telnet (现在还开不了 SSH)打开浏览器进入 192.168.31.1 ,配置并等待初始化完成。此时会包含 stok=xxxxx ,把 xxxx 复制出来,以下用表示复制出来的部分。注:一定要等上面初始化完成,否则下面的命令无法执行。复制下面这串:http://192.168.31.1/cgi-bin/luci/;stok=<STOK>/api/xqnetwork/set_wifi_ap?ssid=whatever&encryption=NONE&enctype=NONE&channel=1%3B%2Fusr%2Fsbin%2Ftelnetd贴到浏览器(注意替换 <STOK> ),回车。这个用来开启 telnet 。执行结束会提示: {"msg":"未能连接到指定WiFi(Probe timeout)","code":1616} 虽然信息是错误,但实际上是成功。复制下面这串:http://192.168.31.1/cgi-bin/luci/;stok=<STOK>/api/xqsystem/set_name_password?oldPwd=<CURRENTPASS>&newPwd=<NEWPASS>贴到浏览器(注意替换 <STOK> <CURRENTPASS> <NEWPASS> (当前路由登陆密码) (新的登陆密码)),回车。这个用来重新设置密码。执行结束会提示: {"code":0} 。此时 telnet 已开启。打开 Windows 的 cmd,并连接路由器:telnet 192.168.31.1 23如果提示找不到 telnet,需要在控制面板的【程序和功能】->【启用或关闭 Windows 功能】里面找到 【Telnet 客户端】,前面的打勾,并点【确定】。连接时的用户名为 root,密码为刚才的三、备份 MTD在cmd输入命令cd / && ls插入U盘,在telnet里面进入U盘文件夹。在 /extxxxx/ext4 里面(本例中为 /extdisks/sda1 )这里的 xxxx 根据不同情况可能不同,你可以 cd / && ls 看到以 ext 开头的文件夹执行以下命令:for name in $(grep -v 'dev' /proc/mtd | awk -F ':' '{print $1}'); do dd if=/dev/$name of=/extdisks/sda1/$name.bin; done四、刷引导 BootLoader(不死 Breed)主要是为了避免把路由器刷坏,没法恢复。只要刷成功,以后就不用怕了。而且刷固件用界面操作也比较方便。进入官网 https://breed.hackpascal.net找到 breed-mt7620-xiaomi-mini.bin 并下载到 U 盘进入 U 盘,执行命令写入:mtd -r write /extdisks/sda1/breed-mt7620-xiaomi-mini.bin Bootloader等待路由器重启重启后灯会闪烁,等待灯常亮,即表示成功。进入Bread1.关掉路由器电源2.先按住reset键,再接通路由器电源,等待 3 秒,灯闪烁后再放开reset键打开 192.168.1.1刷 OpenWrt法一:Bread 刷 OpenWrt获取 OpenWrt 升级包下载地址回到 OpenWrt 的页面https://openwrt.org/toh/xiaomi/mini找到【OpenWrt support】这一块,复制【Firmware OpenWrt Upgrade】下面的链接下载这个以 -ramips-mt7620-miwifi-mini-squashfs-sysupgrade.bin 结尾的文件进入 Bread在【固件启动设置】里,将类型设置为【小米 Mini】在【固件备份】里,都点一遍在【固件更新】里,在【固件】一栏选择刚才下载的 bin。点上传,等待上传完毕,路由器会自动重启。重启后会亮红灯闪烁,等待红灯常亮,即表示成功。法二:下载和写入 OpenWrt 升级包获取 OpenWrt 升级包下载地址回到 OpenWrt 的页面https://openwrt.org/toh/xiaomi/mini找到【OpenWrt support】这一块,复制【Firmware OpenWrt Upgrade】下面的链接升级刚刚连接的 telnet 执行:cd /tmpwget http://downloads.openwrt.org/releases/18.06.4/targets/ramips/mt7620/openwrt-18.06.4-ramips-mt7620-miwifi-mini-squashfs-sysupgrade.bin检查 MTDcat /proc/mtd你可以看到有一行包含 OS1写入升级包mtd -r write 刚刚下载的文件名 OS1写入完成后,路由器会自动重启重启后会亮红灯闪烁,等待红灯常亮,即表示成功。配置 OpenWrt以下配置完成后,记得在【系统】->【备份/升级】->【动作】->【生成备份】创建备份。以后重新刷 OpenWrt 的时候,就可以直接导入。不用再做配置。进入 OpenWrt 界面启用 WIFI刚装完后,WIFI 没有默认开启。所以需要用网线连接路由器的 LAN 口。如果电脑连了其他路由器的 WIFI,则先断掉。进入 192.168.1.1 。刚开始会要求设置密码。点【Login】按钮,再点【Go to password configuration…】进入设置界面。在 Password 和 Confirmation 输入密码,点 【Save & Apply】。进入顶部的 【Network】->【Wireless】,选择一个,点击 【Enable】就开启 WIFI 了。点【Edit】进去设置 ESSID(WIFI连接名称)。在【Wireless Security】一栏的 Encryption 选择 WPA2-PSK,然后在 Key 一栏填入密码。点【Save & Apply】。开启 SSH进入顶部的【System】->【Administration】在 Dropbear Instance 下面的 Interface 选择 lanPort 设置一个,比如 55555确保勾选了【Password authentication】和【Allow root logins with password】点【Save & Apply】修改路由地址我这里是路由器用线连接光猫,光猫的地址是 192.168.1.1,无法修改。OpenWrt 也是 192.168.1.1。如果输入 192.168.1.1 会进入 OpenWrt 管理界面,而不是光猫的。所以可以选择将 OpenWrt 的地址改掉。第一种方法是在管理界面的【Network】->【Interface】->【LAN】,把【IPv4 address】这一栏改成类似 192.168.23.1。点【Save & Apply】第二种方法是进入 SSH,编辑文件:vim /etc/config/network修改 config interface 'lan' 这一区块的 option ipaddr,修改后类似于:config interface 'lan' option type 'bridge' option ifname 'eth0.1' option proto 'static' option ipaddr '192.168.23.1' option netmask '255.255.255.0' option ip6assign '60'然后执行 /etc/init.d/network reload,等一会儿就可以通过 192.168.23.1 访问路由器了。我试了好多次第一种方法,总是保存不了,用这个方法才成功。安装管理界面中文包网上说的安装方法大多过时,在 OpenWrt 18.06.4 版本,需要执行以下命令安装:opkg updateopkg install luci-i18n-base-zh-cn从下面这个文档找到的:https://openwrt.org/packages/pkgdata/luci-i18n-base-langUSB 支持安装opkg install kmod-usb-core \ kmod-usb-uhci \ kmod-usb-storage \ kmod-usb2 \ kmod-usb-ohci \ block-mount \ mount-utils \ fdisk如果 U 盘或移动硬盘是 FAT32 的,就装 kmod-fs-vfat;如果是 NTFS 的,就装 ntfs-3g。挂载执行 mkdir /mnt/usb 创建等下的挂载目录插入 U 盘执行 fdisk -l | grep "^/" 会看到与 U 盘容量差不多的分区。这里假设为 /dev/sda4执行 mount /dev/sda4 /mnt/usb这样进入 /mnt/usb 就能看到 U 盘的文件了主要参考文档基础知识:https://www.zoulei.net/2016/05/05/openwrt_recovery_you_need_to_know/https://openwrt.org/toh/xiaomi/minihttps://leamtrop.com/2017/05/11/flash-openwrt-squashfs/http://bbs.xiaomi.cn/t-13391060-1-o0修改路由地址:https://www.cnblogs.com/double-win/p/3841017.htmlBreed:https://www.jianshu.com/p/cab3062ef920U 盘:https://jingyan.baidu.com/article/5225f26b6b273fe6fa090829.htmlU 盘:https://www.cnblogs.com/double-win/p/3841801.htmlMTD:http://blog.chinaunix.net/uid-28790518-id-5082378.html转载自https://schaepher.github.io/2019/07/25/xiaomi_router_mini_openwrt/


您的IP: